This page explains how you can get a conference page hosted on mathconf.eu. The process is intended to be technologically simple and stable. After the initial setup of your page, it should allow you to publish updates to the webpage simply by pushing a new commit to GitHub.
The way mathconf.eu works is:
- A conference is identified by its page key which is a string like
gcc-uit-2025. This is the subdirectory in which the conference pages live, e.g., https://mathconf.eu/gcc-uit-2025. - The server associates an access token with each page key. Anyone with the access token can publish updates to the conference page by sending an archive with HTML, CSS, etc. files to the server. This archive is unpacked and published verbatim.
Note on processing data: We only serve static websites. There is no Perl, PHP, Node.js etc. running on the server and so you cannot serve dynamic websites. You also cannot accept or process user input through HTML forms. If you want to run, e.g., a registration form, you have to set this up on another web service like Nettskjema which makes an effort to comply with the privacy and security regulations for handling such data.
Get an access token
To reserve a page key and get an access token for it, you should contact Tobias Boege by email. Currently this has to be done manually and is based on trust that you will not abuse this service.
Creating your website
Once you are entrusted with an access token, you can publish anything inside your page directory on mathconf.eu by simply sending a bunch of files to the server. This gives you a great deal of flexibility in how to author your website. You can write your website in HTML from scratch or use one of the many static site generators out there, such as Hugo or Jekyll.
Now is a good time to have a look at the source code repository of this tutorial page. It is written using the extremely simple zs static site generator. I wrote a simple HTML template and CSS style which you can see on this very website. To get your page up and running quickly, we are going to reuse this template and just change the contents in critical places.
Step 1 is to fork the repository. Once you have your own fork at user/howto
you will want to rename it to something more appropriate like user/myconf.
Make a local copy to modify it:
1$ git clone https://github.com/user/myconf && cd myconf
You will find that this tutorial is written up in the index.md file. There
is a CSS file for styling and there is a subdirectory .zs to control the
operation of the zs program. In it there are some configuration files and
the HTML template. All in all, there is not much. Look at all the files and
make changes as necessary to describe your conference or event.
To build and preview your website, you need the zs program.
See its README for installation
instructions. At the time of writing, this can be done by
1$ go install go.mills.io/zs@latest
This will install the program into $HOME/go/bin if you don’t have anything
specific set up. You may have to add this to your shell’s $PATH. Afterwards,
you can build your website and look at it locally:
1$ zs build  # files are written to .pub
2$ zs serve  # run local HTTP server
3INFO[0000] zs 0.0.0@HEAD server listening on :8000
Open your web browser and point it to localhost:8000 to view your page.
Publishing
When you are satisfied with your page, run zs build to get the final product
assembled in the .pub directory. Then tar it up like so:
1$ zs build
2$ tar -zcvf myconf.tar.gz -C .pub .
It is important that this archive is “flat”: it should directly contain all
files and subdirectories in .pub but it should not contain the .pub
directory itself. Next we upload it to the server using our access token:
1$ export PAGE_KEY=myconf         # your page key goes here
2$ export ACCESS_TOKEN=12EcRjvTo  # your access token goes here
3$ curl -F "token=$ACCESS_TOKEN" -F "archive=@myconf.tar.gz" "https://mathconf.eu/publish/$PAGE_KEY"
4Successfully updated myconf!
This process can be automated using GitHub Actions. If you forked the
repository of this tutorial, you will already have a GitHub action set
up which will publish your page on every commit that you push to the
repository. It only requires two repository secrets to be operational:
the page key and the access token.
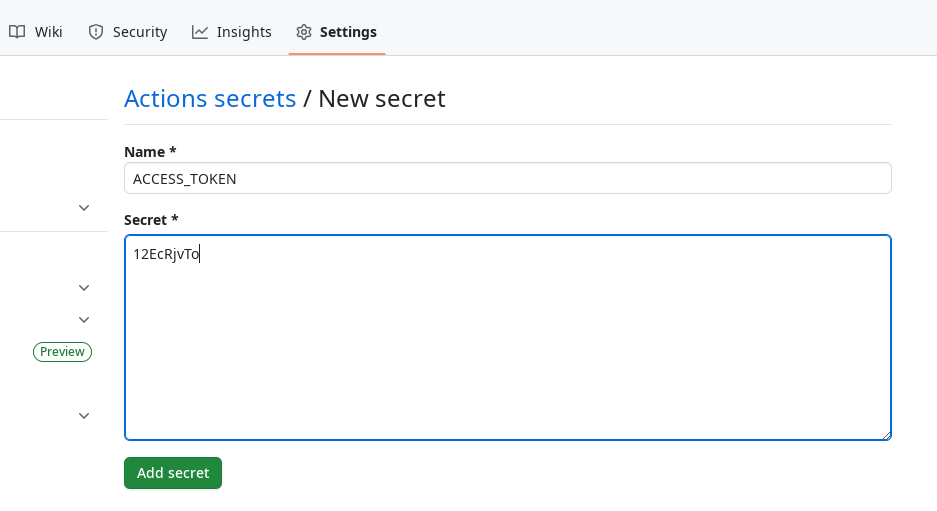
In your repository “Settings” under “Secrets and Variables” you have to
create the secrets PAGE_KEY and ACCESS_TOKEN with the values you get
by email upon registration. They will be similar to the ones shown in
the terminal session above. GitHub will keep these values secret but make
them available to scripts running as Actions on behalf of you, e.g., when
you push a commit.
Now you’re all set! Whenever you push to your main branch now, the GitHub
Action will be triggered and hopefully succeed in deploying the website and
making it publicly available immediately.
